No products in the cart.
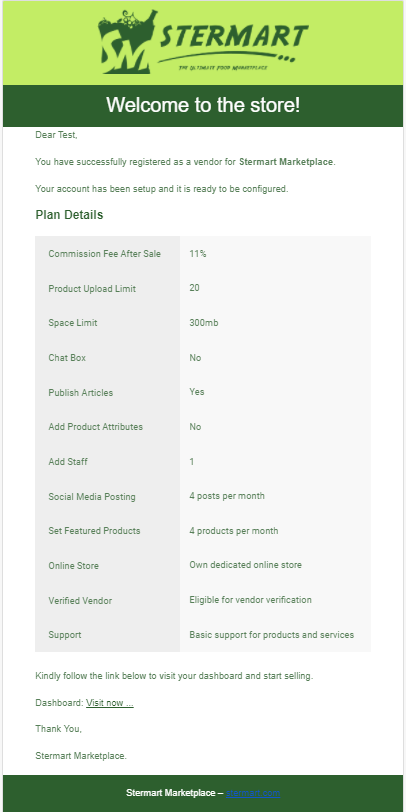
After an approval of your seller account, you will receive an email that confirms your approval and a link to set up your store. You will also be able to login to https://www.stermart.com/my-account/ and the Setup Wizard will automatically begin. Let’s walk through the Setup Wizard process:
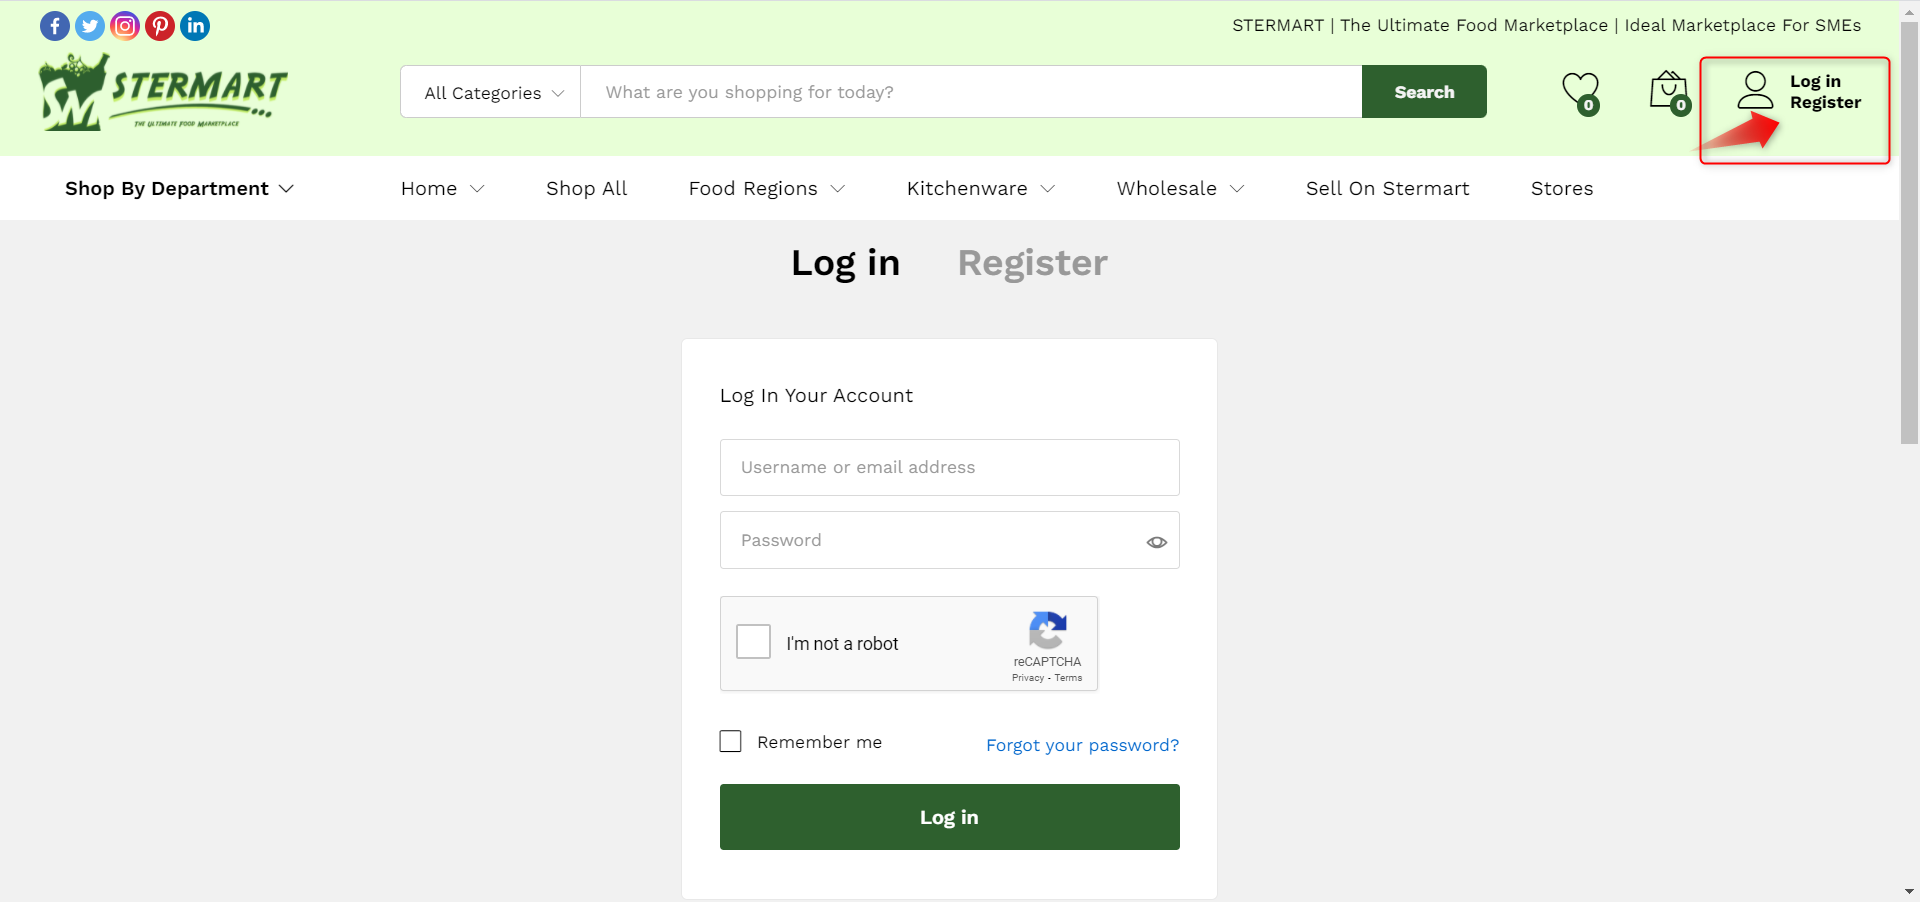
1. Visit to Stermart Marketplace Seller Portal and use your Email Address and Password to login.
This is how your store dashboard looks like.

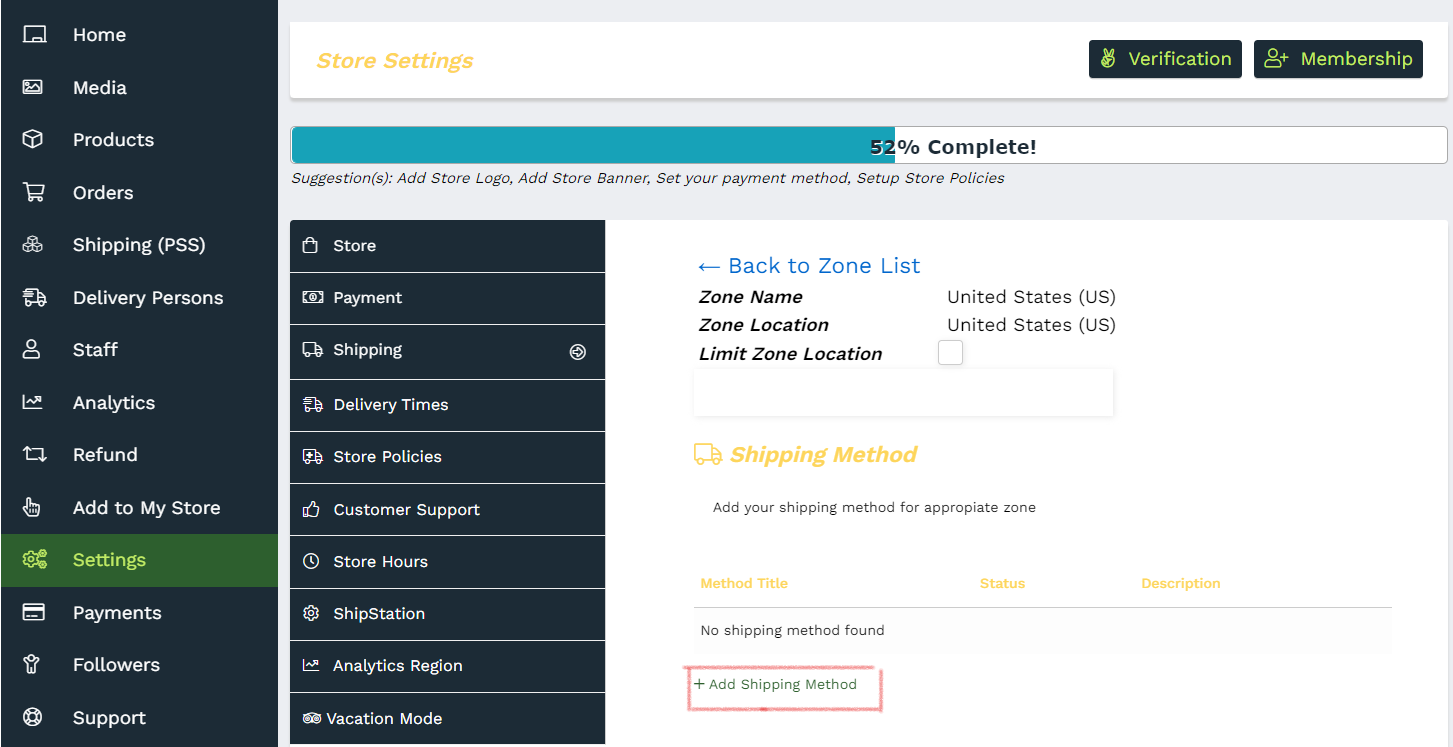
2. Go to Settings from the menu options at the left side and click on ‘Settings’
2.1. First is your Store setup. You can upload your Store Logo and Banner (Select Static image or Slider), which will be displayed on your Store page. Enter the Business/Store name in the Shop Name field. Enter the Business/Store address in the Store Address fields including City/Town, Postcode/Zip, Country, State. Enter your Business/Store’s full address in Find Location field to show your Store Location via Google Map. Enter the description of your Business/Store in Shop Description section. Once you’re finished entering all necessary fields, click on Save to go to the next step.

2.2. Next is your payment setup – how you want to receive payments. This is to setup your method of receiving payment for sold items/orders from Stermart. We currently offer PayPal and Stripe as a payment method and will be adding others methods like Bank Transfer. Please select the Preferred Payment Method of your choice from the dropdown option. For PayPal, enter your PayPal account email address. For Stripe, Click on Connect with Stripe button to connect your Stripe account. Click on Save to go to the next step.

2.3. Next we will go over how to setup the Shipping Settings.
You will see couple of settings on this page.
a) Enable Shipping – Check this if you want to enable shipping for your store.
b) Processing Time – The time required for actual shipping & handling (not delivery).
c) Shipping Type – You can choose from these Shipping Type options: Shipping by Zone, Shipping by Weight, Shipping by Distance. We’ll go over each Shipping Type below.


Shipping by Zone – This is the most common way to setup your shipping. If you have a set shipping rate that you charge your customers based on shipping methods, this will be the option to use. We’ll setup an example Shipping by Zone rate.
Currently, Stermart.com only allows United States (US), Canada (CA) and Australian (AUS) Sellers. For now, you will the three (3) countries listed under Zone Name and Region(s). All you have to do is add the Shipping Method by clicking on Add Shipping Methods on the right of “No method found” message or clicking on Edit button below the name of the country you are selling from under Zone Name.

Now you’ll see a new page where you can add the shipping method. From this page, click on Add Shipping Method link and a popup option will appear to Select Shipping Method. You’ll see 3 options: Flat Rate, Local Pickup, Free Shipping.

Flat Rate – If you want to charge customers a Flat Rate for shipping fee such as $4.99, you’ll choose Flat Rate and click ADD SHIPPING METHOD.

After you’ve clicked on ADD SHIPPING METHOD, Flat Rate will appear under Method Title. Make sure to check the checkbox below Status to have it enabled. Now click on Edit to enter the shipping fee and you’ll see a popup as below. Enter the Shipping Fee under ‘Cost’.
You can change the name of this shipping method such as Standard Shipping (5 Business Days) or Priority Mail (3 Business Days) by editing the Method Title field. Add the actual shipping fee you would charge a customer for this shipping method on Cost field. We’ve mentioned $4.99 above but you can enter whatever amount you want but make sure to be fair as customers tend to avoid buying from sellers who charge high shipping fee. Don’t enter 0 because we will use separate Free Shipping option for this purpose. You can ignore the rest of the field as this is an advanced option which is only necessary if you need to setup a special shipping fee.
Click SAVE METHOD SETTINGS when done. If you want to setup two different types of Shipping Method such as Standard Shipping and Expedited Shipping or USPS First Class Mail and USPS Priority Mail, you’ll just repeat the steps above to add another shipping method with different Method Title and Cost as shown below.

Free Shipping – If you want to add a Free Shipping option, select Free Shipping from Add Shipping Method popup windows mentioned above. Click on Edit button under Free Shipping to edit its option.
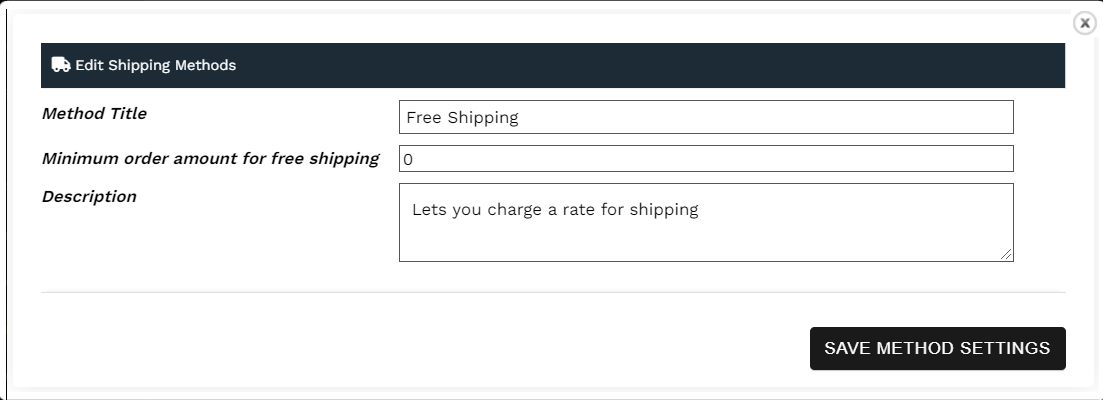
a) Method Title – You can leave this as Free Shipping or change to whatever you want such as US Standard Free Shipping.
b) Minimum order amount for free shipping – If you want to offer Free Shipping for orders over certain amount, for example $50, enter 50 into this field.
c) Click on SAVE METHOD SETTINGS to save and close the popup window.
Now you’ll see the 3 Shipping Methods that we’ve setup as seen on the image below. Since this was just an example, or you may actual use these example, you can decide on your own shipping methods and rates.

Please note that you must setup the Shipping Settings in order to receive the order.
2.4. We will go over setting up Store Policies where you can input your Store’s Shipping Policy, Refund Policy, Cancellation/Return/Exchange Policy. Once you have finished entering all the policies, simply click on SAVE. That’s it!
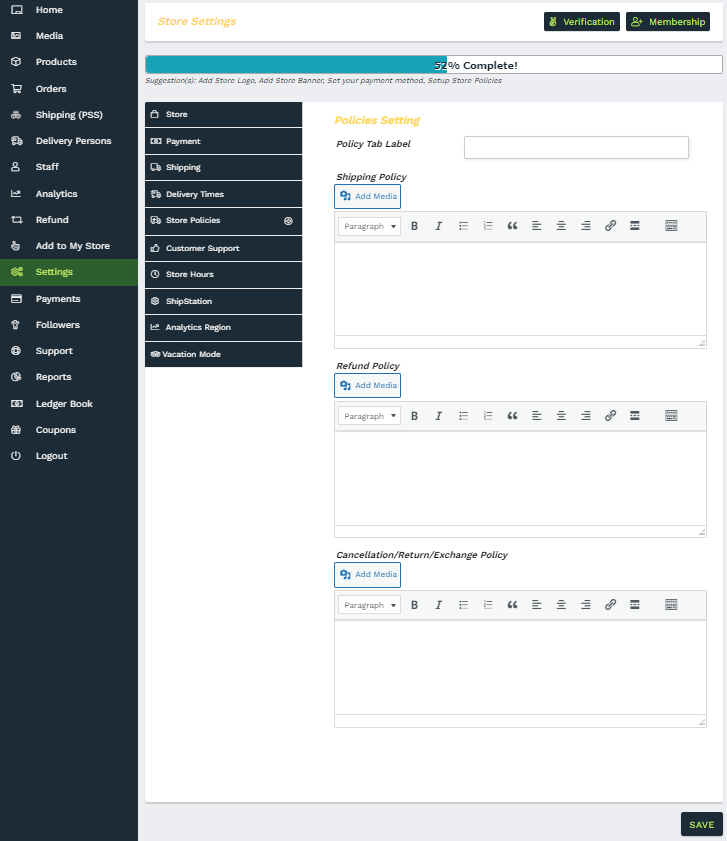
2.5. ‘Customer Support’ settings – Make sure all details are saved correctly.

2.6. ‘ShipStation’ Settings
We are happy to announce the ShipStation integration. If you’re an existing ShipStation user, you can now sync your KoaJoa orders into your ShipStation and easily print shipping label. If you’re not yet using ShipStation, you can easily signup for ShipStation and take advantage of ShipStation’s advanced features.

About ShipStation – https://www.shipstation.com
ShipStation leads the e-commerce world with our web-based software designed to make e-commerce retailers exceptionally efficient at processing, fulfilling, and shipping their orders from all the most popular marketplaces and shopping carts using all the top carriers. We combine order processing, production of shipping labels, and customer communication in an easy to use, web-based interface that integrates directly with major carriers and online platforms. By taking care of the small stuff, we allow you to focus on what you do best.
Founded in 2011, the Austin, TX-based company has multiplied its size but our mission remains the same. We focus on the user, and aim to continue to build out the best shipping software around. If you’re interested in joining the team, head to our Careers page and see what positions are open!
2.7. ‘Vacation Mode’ Settings

The settings shown above are very important for your store setup. We have you have a hassle-experience with Stermart Marketplace!